
A Step By Step Guide To Installing A Heron Guard
For A Pond With A Hard Surround
|
|
|
|
| For Optimum Viewing Of This Site |
| Close your Favourites and History Side Bar |
Open the packet containing the fitting kit for the Heron Guard. Each packet will contain 10 sockets, 30 screws and 30 plastic plugs.
Tadpole Tip: Before fixing the sockets around the pond, have a practise first. Make your mistakes somewhere unimportant - for example: on a loose house brick or a hidden area of patio.
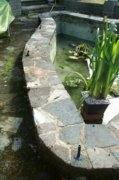
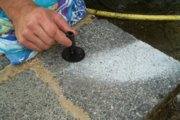
Place the sockets at intervals around the edge of the pond so that each socket is approximately 4-6 inches (10cm-15cm) from the edge of the pond. Choose the location for each socket carefully. Use as few sockets as you can. Locate them at shorter intervals for tighter curves and longer intervals for gentle curves and ponds with straight edges. A few well placed rods will look much better than lots of unnecessary rods placed at short intervals around the pond.
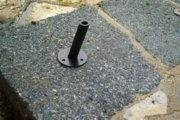
Each socket has a circular base. The circular base contains 3 small holes. The holes are for the screws which will secure the socket firmly to the edge of the pond.
Carefully mark the location of the 3 holes with a crayon or marker.
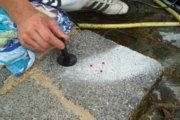
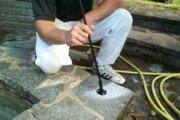
Move the sockets out of the way while you carefully drill 3 holes precisely in the positions you have marked out.
Use a 6mm masonry drill and make sure that the holes are exactly in the positions marked.
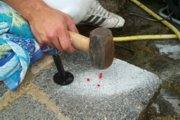
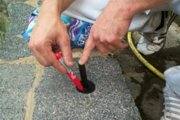
Place one of the red plastic plugs provided into each hole.
Knock each plug firmly into its hole with a hammer.
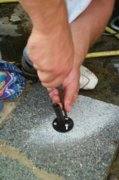
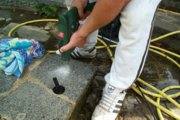
Replace the socket into position over the plastic plugs. Place one of the screws provided in each hole and use a screwdriver to tighten each screw firmly into the plastic plugs. The socket should now be firmly screwed to the edge of the pond. Fix each socket into place around the edge of the pond in the same way.
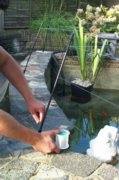
Open the packet of Heron Guard rods. Each packet will contain 10 rods. Push each rod firmly into the sockets you have installed around the edge of the pond.
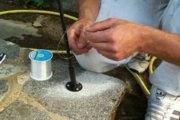
When all the rods are in place, stretch fishing line between each rod, tying the fishing line to each rod as you go. Use the grooves provided to locate the fishing line. When you have finished, there will be 3 single strands of fishing line encircling the pond, evenly spaced at different heights.
Tying the fishing line to each rod will mean that if the line is accidentally cut or damaged, only a small section of line will be affected. The line cannot then unwind from the other rods around the pond.
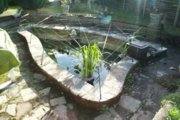
The rods should be located around the perimeter of the pond so that when the fishing line is stretched around the rods, all of the pond is contained within the circle of fishing line. Use the rods to stretch a few strands of fishing line diagonally across the pond. Use only the top grooves for this.
Do you have a statue in the pond or any other object which the heron could land on and fish from? If so, stretch fishing line between the rods so that they cross over the top of the statue and make it difficult for the heron to land.
All Tadpole Products Are Now Available Through Wilde Waters Ltd
Wilde Waters Ltd
195 Portsmouth Road, Cobham
Surrey KT11 1JR England
Telephone: (01932) 866898